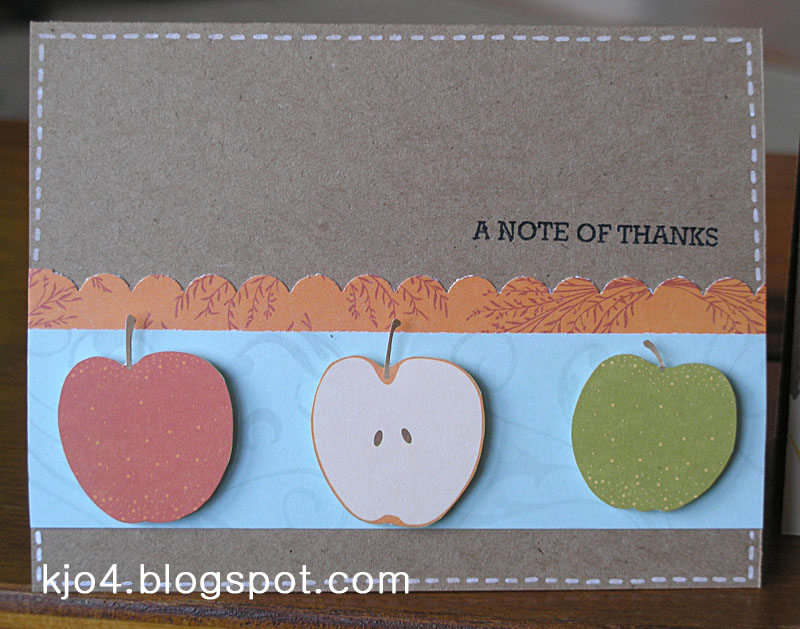
This is the last week of school so I thought I'd put some Teacher cards together. This stamp set is from Papertrey Ink, the ink & paper is Stampin' Up!. The colors I used were, Whisper White, Basic Black, Lucky Limeade, Real Red, Crushed Curry, Early Espresso and Always Artichoke. I don't think we thank our teachers enough, they have a tough job, so to all the teachers out there... Thank You for all you do!!!
Showing posts with label cards. Show all posts
Monday, May 7, 2012
Tuesday, April 17, 2012
More Cards
Here is another set I did as a "Thank You" for a customer. I love making cards to have on hand to give to people! I cleaned of my workspace before I made these so I tried to use up my scraps. The stamp set I used is one of my favorites from Stampin' Up! but has been retired for quite awhile. The cherry one is probably my favorite from this set! I used 1 1/4 circle punch for the cherrys and another VERY small circle punch for the "highlight", then I stamped the stems from the stamp set & stamped teh leafs on Lucky Limeade Cardstock & cut those out and paper pieced it all together. Fun times!
![]() |
| These is the "tag" for the package |
Wednesday, April 11, 2012
simple card set
Here's a card set I made as a gift to say "thank you" to a loyal customer of mine. My camera ended up going home in my sisters car but hopefully I will get it back this weekend. So, these pictures were taken with my cell phone, so I'm sorry the quality & color is so off, these cards were so pretty in real life! Make some for yourself & see! The design was inspired by another Stampin' Up! demonstrator, Catherine Pooler.
Products Used : In-Color 2011-2013 Card Stock (124329) - Friendly Phrases Stamp Set (w:126149 c:126151) - Party This Way (w:118744 c:120609) - Retried Stamp Set - Whisper White Card Stock (100730) - Snail Adhesive (104332) - Stazon Black Ink (11406) - Daffodil Delight Ink (119667) - Pumpkin Pie Ink (105216) - Real Red Ink (103133) - Lucky Limeade Ink (122935) - Pacific Point Ink (111837) - Rich Razzleberry Ink (115658) - Rich Razzleberry Stampin' Write Marker (120970) - Basic Black Stampin' Write Marker (100082)
Thursday, July 7, 2011
Wednesday, January 12, 2011
Sunday, November 14, 2010
more cards
Here are more cards that I made this weekend! The first two are standard size and the other three are mini cards.
Friday, November 12, 2010
Tuesday, October 26, 2010
Holiday Cards for Class at the Community Center
Here are some of the cards I have done for the Holiday Card Class I'll be teaching at the Community Center!
(front of the card)
(inside the card)
(front of the card)
(inside the card)
Tuesday, October 19, 2010
This Crazy Life - Pinwheel card
So this is the first pinwheel I've ever made! It was really easy to do, I think I will have to make some more. Just have to remember to keep them out of reach of Reagan because she REALLY wanted to blow on this one to make it spin! lol! This is also part of a challenge I am doing, trying to use only little stamps that I got from Michael's $1 bin. The sentiment "This Crazy life" had a box around it, but I needed it on another card, so I cut it out and now have two stamps. Thats the great thing about the clear stamps, you can cut them! Also, the "abc's" on the side are part of a set I got for $1. The paper is all from the My Mind's Eye - Love Me Do collection.
Monday, October 18, 2010
You Make Me Smile - Card
This card was made with a variety of papers, the stamp is from Ali Edwards. The real reason I made this card was so I could get to use my i-top to make my own brads!!! so they MATCH the other elements! I love it!
Cheer Up
Here is a card that I made this morning using a stamp set I picked up at Michael's in the $1 bin!!! There are 3 images and 4 sentiments in this little mini set. When I make a card, I like to make 2 at a time, of the same card of course. Since you've got all the stuff out why not make two! So, the first one I made I had the front all done and was about to stamp my "Handmade" stamp on the back. The card was unfolded and laying flat on my desk so I could get a good stamp on the back. I had my Stazon ink pad in my hand and DROPPED it on the front of the card!!! GGGRRR!!!! Oh well, that was a practice card.:D I gave it to Reagan, she was THRILLED to get it!!! The papers I used were scraps from different packs. To color in the Rainbow I used Stampin' Up! Watercolor pencils and a Blender Pen also from Stampin' Up!

Tuesday, June 8, 2010
My first Digital Cards!


These cards were made using Creative Memories Storybook 3.0 program. I was able to use the same supplies I use on my scrapbook pages. Although I really like the look and feel of a traditional card, I can see myself doing some hybrid cards in the future! Also if I'm in a hurry and need a card, I can just print one of these out on my home printer and call it good!
Sunday, February 7, 2010
Homemade Card Display

here is my card displays that I made yesterday. I'm planning to put them at the studio. They were fairly easy to make, where is what I used...
2 frames (1-20x24 & 1 -15x30) & boards that same size
2 pkg of 12x12 corkboard
adhesive
2 spools of ribbon - brown grossgrain
1 pkg thumb tacks
framing supplies
First, I did a dry fit of the cork board and cut the pieces I needed. Then glue them down to the board.
Second, I laid the ribbon down and figured where it needed to go. Then cut it & tack it with a thumbtack and wrap it around the edge of the board and pull it to the right spot, wrapped it, tacked it and cut it. Repeat until board looks good.
Third, I pushed a tack where the ribbon crossed over the other ribbon. Then frame it up & load it up!
Easy peesy!
I'm gonna get some decorative brads to replace the white thumbtacks as soon as I find the ones I like!
Subscribe to:
Posts (Atom)